Customize the Responsive Sign-in Page
Want a highly-polished, great looking extranet portal without engaging a skilled graphic designer and web developer? So do we! If you figure out how, let us in on the secret.
Until that is possible, we can give you a few tips on turning ExCM's new out-of-the-box responsive extranet sign-in page into a slightly customized page. If you just want to personalize the page with custom wording and maybe an image, read on because we can help you see how to do that.
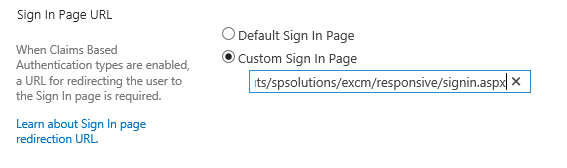
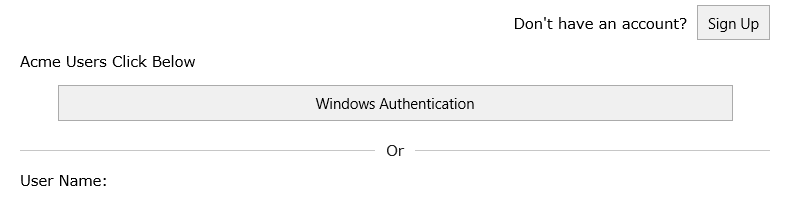
Out-of-the-box, after changing this setting above in Central Administration you should see this new responsive Sign In page if you browse to your extranet site:

Let's get ready to make some basic customizations.
The instructions below assume you are working in a SharePoint 2013 environment. As such, the starting point for making the customizations is within the "15" folder at:
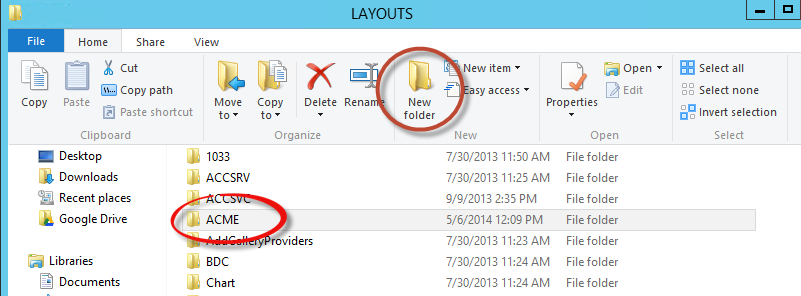
The first thing you need to do is make a copy of the existing page and palce it in a new folder. We typically call this the "Organization Layout Directory" because it's simply creating a new folder under the "15TEMPLATELAYOUTS" directory that we can use for customized pages. You will need to navigate to the following:
Once there, click on "New Folder" and name it, perhaps using your company's name or acronym. For this example, I will be working with ACME Co.
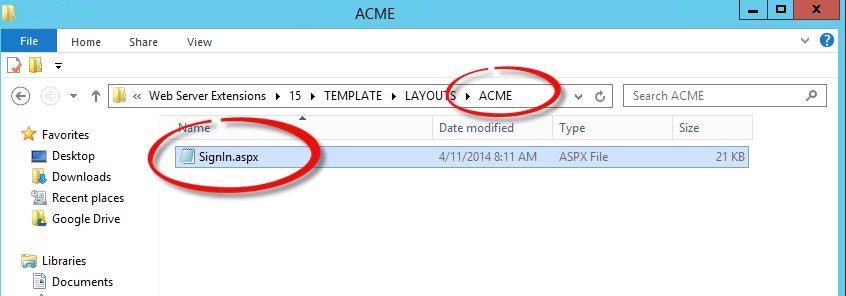
Next, you will need to make a copy of the existing page and place it in your new folder. To do so, navigate to:
Now, find the "SignIn.aspx" page and copy it:

After copying the page, paste it in the new Organization Layouts Directory (ACME in our example):
Now you can edit your page using Notepad, or another editor. The first thing we are going to change is the wording “sign in using:”
To do so we need to search for Text="<%$Resources:excm,AuthProviders_SignInUsing %>
![]()
We simply place the text we wish to appear in between the quotes. For our demo we will use “Acme users click below”

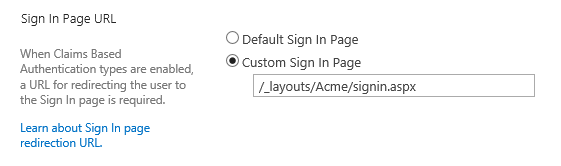
Once saved, we need to change the log in page to point to our new Acme folder:
Then, we can browse out to the site and see the change has been made:
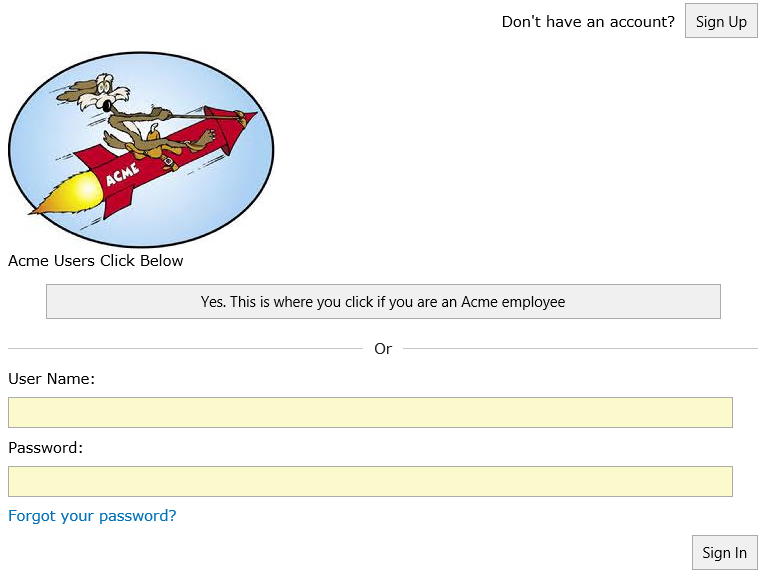
If you think that is still not enough and you need to change the wording of the button, you can do so. Just a few more lines down you will find the text Text='<%# DataBinder.Eval(Container.DataItem, "ClaimProviderName") %>'. Replace everything in the quotes with the text you want to appear.

Browse out to the site and see your new button text:

But that is all the simple stuff, what if we want to get fancy with it. Lets add an image or change some colors… where do we go for that? This page was built so that anyone with web design experience could easily work with and build a great looking page. So, if you really want a snazzy portal, I suggest you find yourself a designer and ask them to help. With the way this custom page was built, it should be very easy for them to get you the desired look in no time and it be done the correct way.
For now, we will show you how to add an image with some simple HTML. If you wanted to add an image just above the “Acme users click below” text, you can navigate to the section of the page just above the “Acme users click below” line and add the following line of text:

My image is sitting in the 15/template/images folder and thus my image source points to my desired image.
Now, when I browse out I should see an image:
This is a very simple example. If you study the code of the out-of-the-box page in detail you will see that it has been developed with customization in mind. Like we said above, a professional web designer could make quick work with extensively customizing your extranet's responsive Sign In page and it will be able to fit the size of any device that browses out to the page.
Here is an example of the responsive Sign In page styled for a particular business's extranet:

©2019 PremierPoint Solutions. All Rights Reserved.